PPK Overview
Much of this information is from the GeoTagz Manual by Septentrio which can be found here.
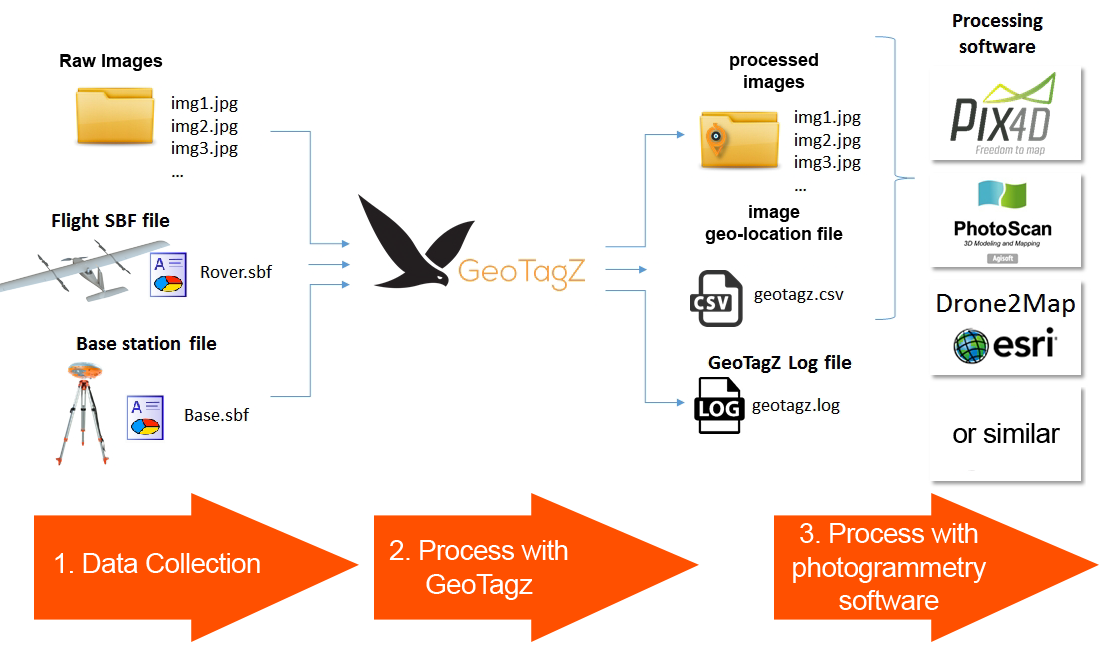
Using Septentrio's GeoTagZ in combination with Lynx VTOL PPK and the on-board AsteRx-m2 GNSS receiver, it is possible to obtain centimeter-level precision on the ground from aerial mapping. Compared to traditional survey methods, aerial mapping using Lynx VTOL PPK is significantly faster and cheaper. With GeoTagZ in your workflow, there is now no longer any need for Ground Control Points or a real-time data link to the UAS.
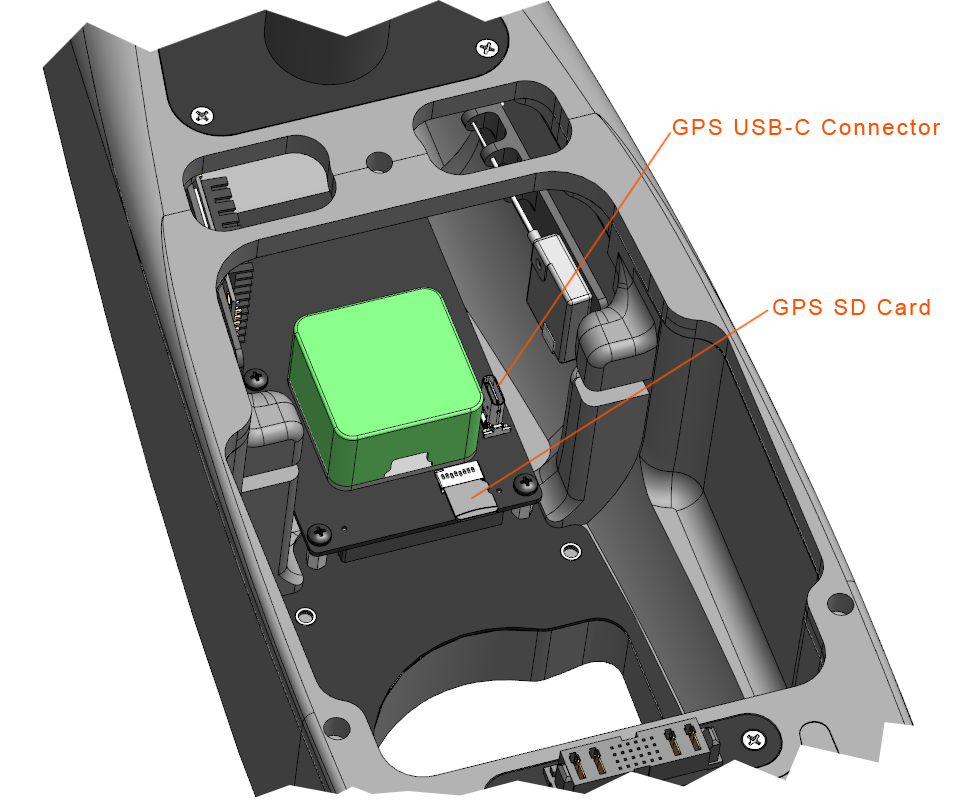
The on-board AsteRx-m2 receiver time-stamps camera shutter events to precisely identify the times when photographs were taken. These event markers along with the GNSS measurements are logged during the flight to the on-board SD card in Septentrio Binary Format (SBF).
After the flight, GeoTagZ combines SBF data from the aircraft with the data from a base station reference receiver on the ground, replacing the image positions with more precise cm-level PPK values.
The cm-level positions embedded in the EXIF data of the photographs or with the same position data in CSV format allows for seamless integration with image processing software (Pix4D, Metashape). This improves the quality of image stitching while removing the need for ground control points during data collection. Placing and measuring ground control points is always time consuming but in mines, ranges, and difficult terrain it can be far more cumbersome, dangerous or even impossible.
RTK vs. PPK
RTK positioning requires differential corrections from a base station with a pre-surveyed position before the flight. In most applications, these differential corrections are passed to the rover (the aircraft) receiver in real time necessitating a reliable communication link between Base and rover. For drone applications, this can be problematic. The equipment required for an additional communication link between the rover and base station can significantly add to the payload and power consumption of the aircraft. Furthermore, if your link is interrupted during flight, that portion of the flight will loose accurate correction data.
When everything is working well, the accuracy of RTK and PPK will be similar. However, if the rover GPS receiver experiences cycle slips, multi-path or data gaps, PPK becomse the more accurate option. With PPK there is also the benefit of being able to look at the entirety of the recorded data and run through it forward in time from the beginning to the end of the flight as well as backwards in time from the end of the flight. The ability to perform this forward and backward smoothing of the data is not possible with RTK, which is only calculated in real-time.
Required for Precision
For PPK image processing using GeoTagZ you will need:
- Lynx VTOL with PPK option
- Standard mapping payload (24MP)
- SBF data from the aircraft receiver containing GNSS measurements and camera shutter events
- Base station data in SBF or RINEX format. This can be downloaded from either a nearby reference network or from your own receiver, such as an Altus NR3 configured as a base station
GeoTagZ can then combine the GNSS measurement data from the aircraft and base receivers to reprocess the positioning. The images will then be automatically tagged with the new positions and can be easily imported to photogrammetry software.
GeoTagz Features
- GPS+GLO reprocessing for cm-level RTK precision
- GUI and command line versions offering identical functionality
- SBF input for the aircraft rover file
- SBF or RINEX input for the base station reference file
Supported Image Formats
GeoTagZ supports the following picture formats:
- JPG
- TIFF
- DNG
Package Contents
Lynx VTOL will include the following items in addition to the normal packing list:
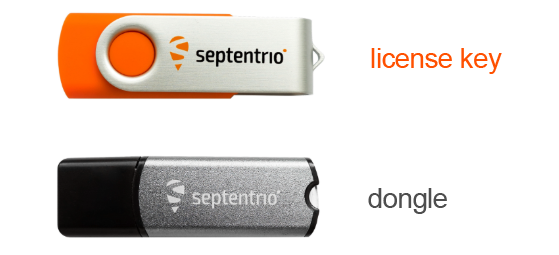
- USB dongle
- Permission license file for the USB dongle
- GeoTagZ installer
GeoTagZ Software User Manual
Installing GeoTagZ
To install the GeoTagZ software on your PC you will need to have:
- A USB dongle and a license file (.bin) from Septentrio
- The GeoTagZ executable file
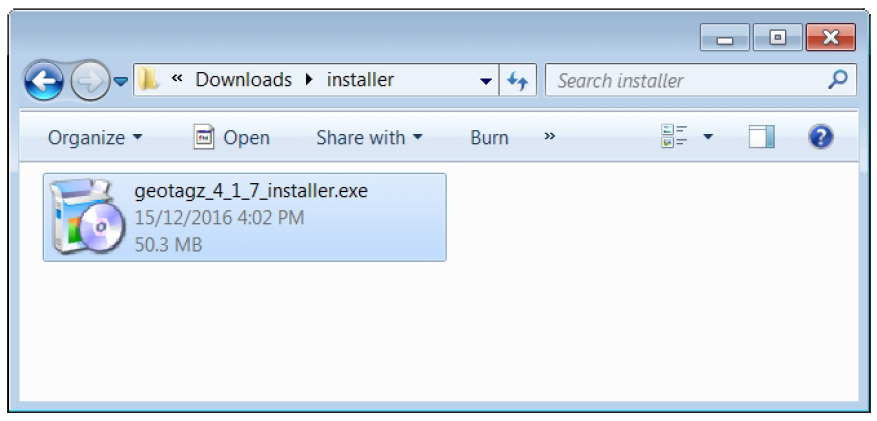
Download the GeoTagZ installer file and license file to your pc. Insert the GeoTagZ dongle into a USB connection on your PC then double click on the installer file to launch the installation procedure.
Follow the sequence of installation windows and select to ‘accept’ the GeoTagZ license agreement.

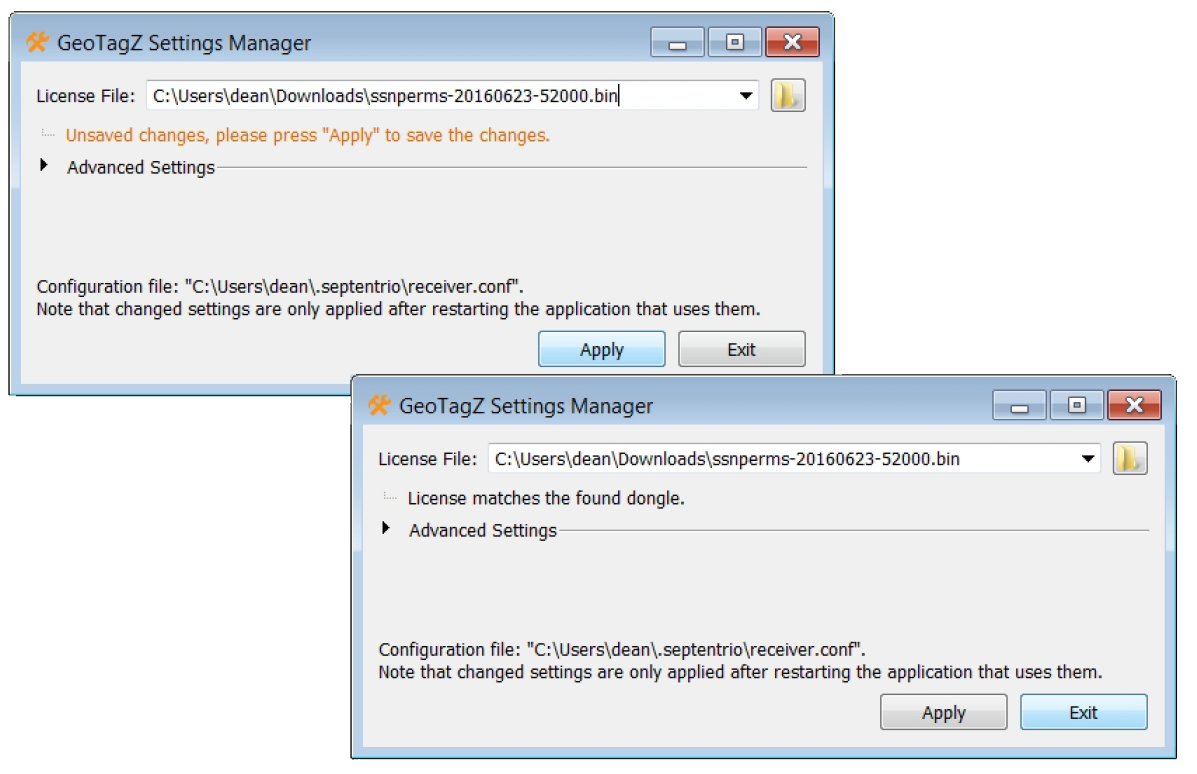
During installation, you will be prompted to input the location of the license file (.bin) for the GeoTagZ dongle. Select this file then click ‘Apply’. If the license file is the correct one for the connected dongle, the message, ‘License matches the found dongle’ will appear. You can then click ‘Exit’ to finish off the installation.
Launching GeoTagZ
- Insert the GeoTagZ dongle into one of the USB connectors on your PC
- Double click the ‘GeoTagZ GUI’ icon

Configuring GeoTagZ settings
You can select input files and configure all GeoTagZ settings on the GeoTagZ GUI as shown.
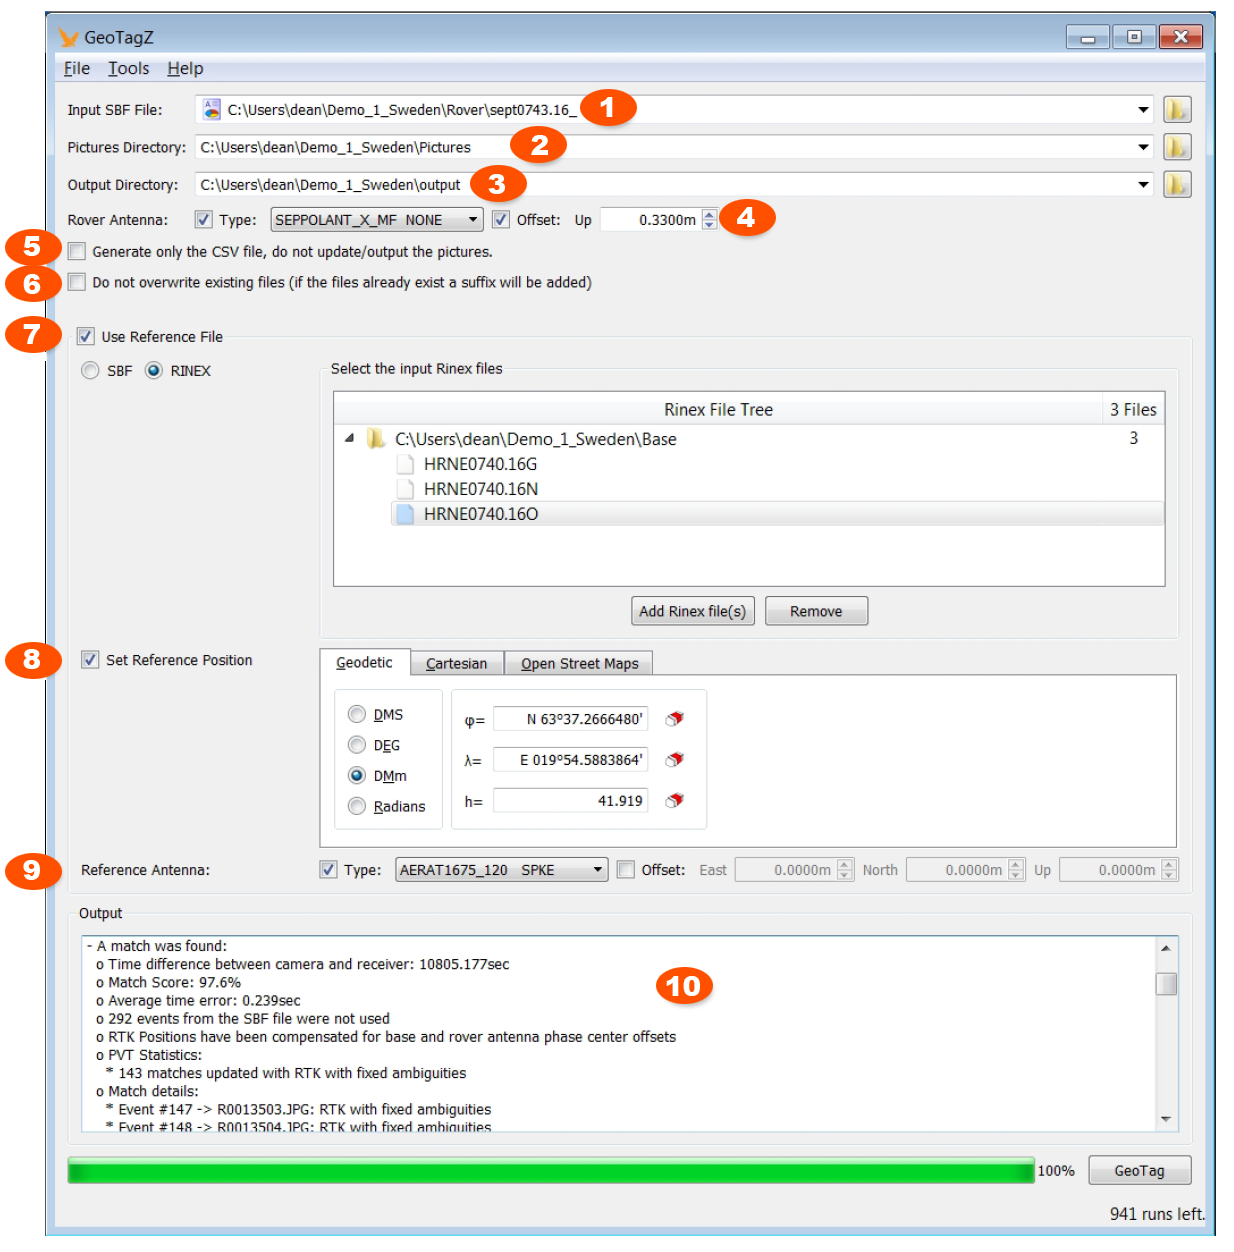
1. The Input SBF File is the rover file that was recorded by the AsteRx-m2 UAS on-board the aircraft.
2. The Pictures Directory is the location of the images taken during the flight.
3. The Output Directory is the location where the geotagged photographs and/or CSV photograph position file will be output.
4. Rover Antenna Type: used to select the type of antenna used by the rover receiver which allows GeoTagZ to take the phase center offset of the selected antenna into account. Offset: the Up Offset is the vertical distance between the antenna phase centre and the principle focus of the camera located within the aircraft. This setting can be ignored because often the photogrammetry software does a better job of estimating this and accounts for attitude changes in addition to a pure Up or Z offset.
5. Generate only the CSV file: checking this box will tell GeoTagZ to only write the photograph positions to a CSV file. The EXIF data in the photographs will not be updated.
6. Do not overwrite existing files: when this box is checked, the EXIF data in existing photographs will not be updated instead, the updated photographs will saved under a filename with an added suffix.
7. Use reference file: check this box to tell GeoTagZ to use the base station file given here as a reference for cm-level RTK positioning. The base station data can be either SBF or RINEX file formats.
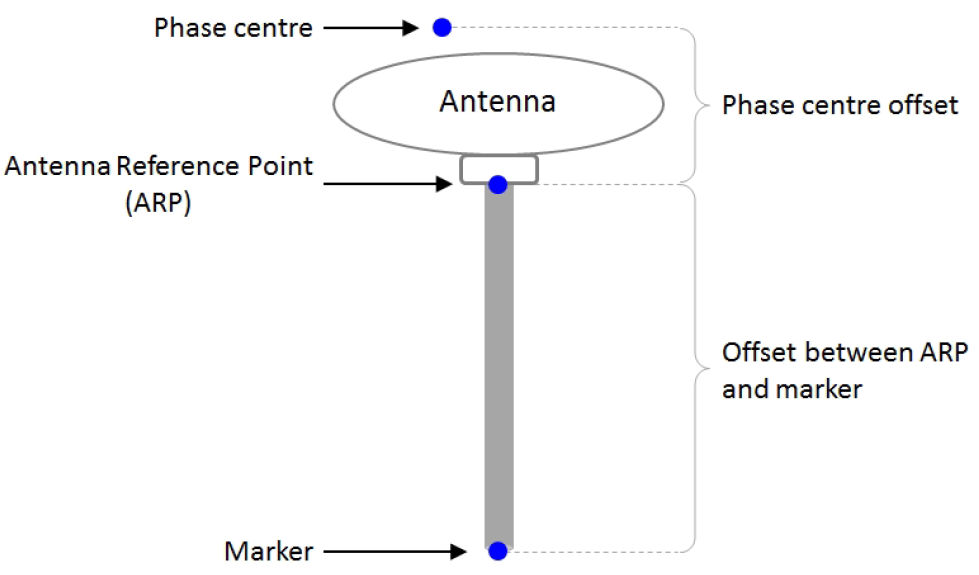
8. Set reference position: by checking this box you can manually insert the position of the base station. Please note that in this case, GeoTagZ will not use the offset in the RINEX file so any offset between the antenna reference point (ARP) and marker (see below) should be inserted manually in field 9. GeoTagZ will however still use the antenna type in the RINEX file.
When the ’Set reference position’ box is not checked, GeoTagZ will:
- in the case of RINEX files, use the position in the RINEX header
- in the case of SBF files, the static position in the SBF file will be used or
- when not configured as static, a position similar to the real-time ‘auto’ setting will be used as the base station position. In this case, it is advisable to manually enter the base station position to ensure repeatability.
9. Reference Antenna Type: used to select the type of antenna used by the base station receiver which allows GeoTagZ to take the phase center offset of the selected antenna into account. By selecting Offset, the East, North and Up offset between the antenna reference point (ARP) and the position marker can be configured. When these boxes are not checked, GeoTagZ will use the antenna information contained in the selected reference file. The image below shows a schematic of the reference antenna setup.
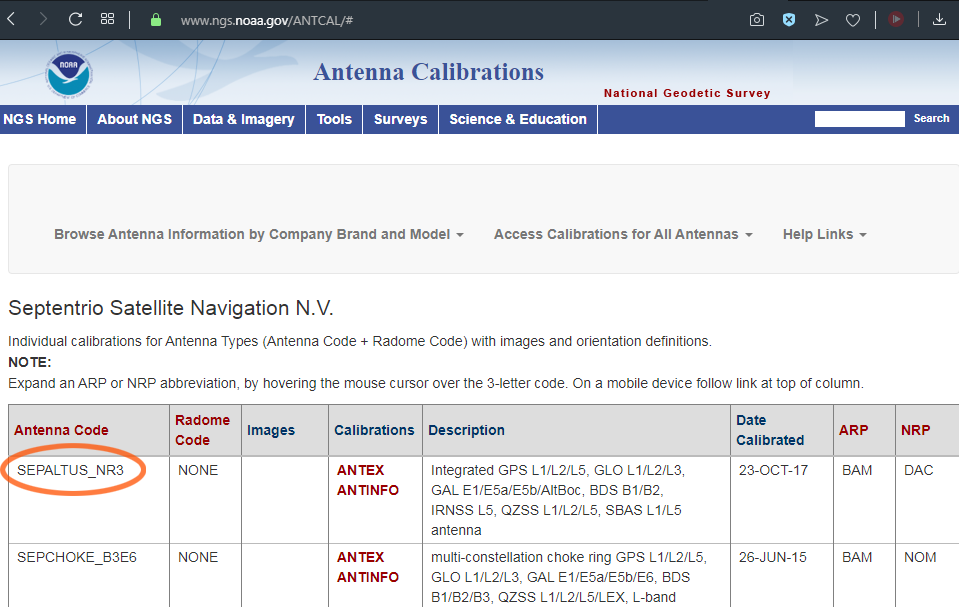
The calibration file for the recommended Altus NR3 base station will be available in the next release of GeoTagz. In the meantime, the NGS (National Geodetic Society) provides specific calibrations for antenna types including Septentrio and other models. The Atlus NR3 file (ANTINFO) can be found here by searching 'SEPALTUS_NR3'.
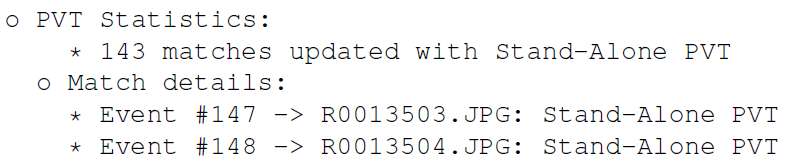
10. Output: this field contains the information written to the log file (geotagz.log). In this example, although there were an excess of events, GeoTagZ was still able to correctly assign the 143 photographs to their correct event. All the photographs were geotagged with the cm-level positioning.
Reference station antenna mounting.
Tagging Multispectral Images
Multispectral cameras present more of a challenge for PPK tagging because there are multiple images created for every trigger command; one for each band. In this case, the Multispectral Mapping Payload generates five monochromtic TIFFs. In order to use GeoTagZ, each band must be separated into its own folder before tagging. The band is indicated by the end of the file name ending in _1 _2 _3 _4 or _5.
After the bands are in separate folders, run the normal PPK workflow for each folder seprately. The images can then be moved back into the same folder once tagged.
Did GeoTagZ processing work?
If all went well with GeoTagZ processing, you should see output messages similar to those shown in field 10.
GeoTagZ Troubleshooting
If something went during processing, GeoTagZ will report errors or warnings. The list below details some of the most common errors reported.
Not enough valid data to compute a Position-Velocity-Time (PVT) solution
This message indicates that the rover file did not contain the necessary data for GeoTagZ to be able to make position calculations.
This message will also appear if you have selected to use a reference file in field 7 but, the RINEX observation file is either missing or corrupt.
When GeoTagZ only reports standalone positions and fails to calculate an augmented GNSS position (DGNSS or RTK) for any of the images, this tends to indicate a problem with the base station reference data. If you are using an Altus NR3 base station, you may not have selected all the data blocks necessary for RTK post processing. If the manually entered position is a large distance from the correct base station distance then GeoTagZ may also not be able to calculate RTK positions.
No match found between the images and the events in the input SBF file
This error message means that GeoTagZ was unable to match up the times reported in the images with the shutter events in the rover (aircraft) SBF file. This may be due to excess events in the SBF file for example, from spurious pulses resulting from signal crosstalk. The problem may also be due to missing images which can happen if the camera fails to recognize trigger commands. In this event, you can end up with more shutter events than images which can cause problems for GeoTagZ during the matching stage. This problem can be avoided by using the feedback signal from the camera as an event signal input for the rover receiver.
RTK positions have not been compensated for base antenna phase center offsets.
This warning message means that the calculated positions have not been compensated for the phase center offset of the base station antenna because the antenna was not found in the GeoTagZ antenna library. When this happens, the phase center offset, as indicated in the antenna reference mounting, can be entered manually as an offset in field 9.
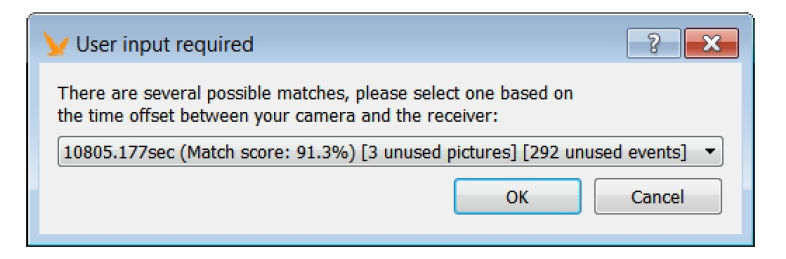
Images with anomalous time stamps
GeoTagZ is able to detect images with anomalous time stamps. When this happens, you will be prompted to select one of several proposed courses of action each of which is given a match score.

If there are files in the image directory that do not have standard file extensions, Geo- TagZ will list them under ’Picture issues’.