Multispectral Mapping Payload
The Multispectral Mapping Payload uses the Micasense RedEdge-MX which features 5 bands and a downwelling light sensor (DLS). The camera sits in a hinged mount which allows easy acces to the camera's SD card when installed within the aircraft. Also included is a regulated power board with trigger and payload connector.
For more information, see the RedEdge-MX Manual by MicaSense which can be found here.

Technical Specifications
| RedEdge-MX | Specs |
|---|---|
| Sensor | RGB, RE, NIR (narrowband) |
| Lens | 5x fixed 5.5mm |
| GSD at 90 m (~300 ft) | 6.14 cm/px |
| GSD at 120 m (~400 ft) | 8.18 cm/px |
| Coverage at 90 m (~300 ft) | 2.5 km2, 617 acres (60% sidelap) |
| Coverage at 120 m (~400 ft) | 3.4 km2, 840 acres (60% sidelap) |
| PPK Capable | Yes |
| Weight | 300 grams with DLS |
| Data | NDVI index map, Chlorophyll map, RGB, point clouds, orthomosaics, 3D models |
Attaching the Camera to the Mount
If you are providing your own camera, you will need to attach the camera to the mount using 4x M3 x 10mm screws (included).
Installing the Camera
The compass on Lynx VTOL can be sensitive to payload changes and may require a compass calibration once your custom payload is installed within the payload bay. See the Calibration section for more information.
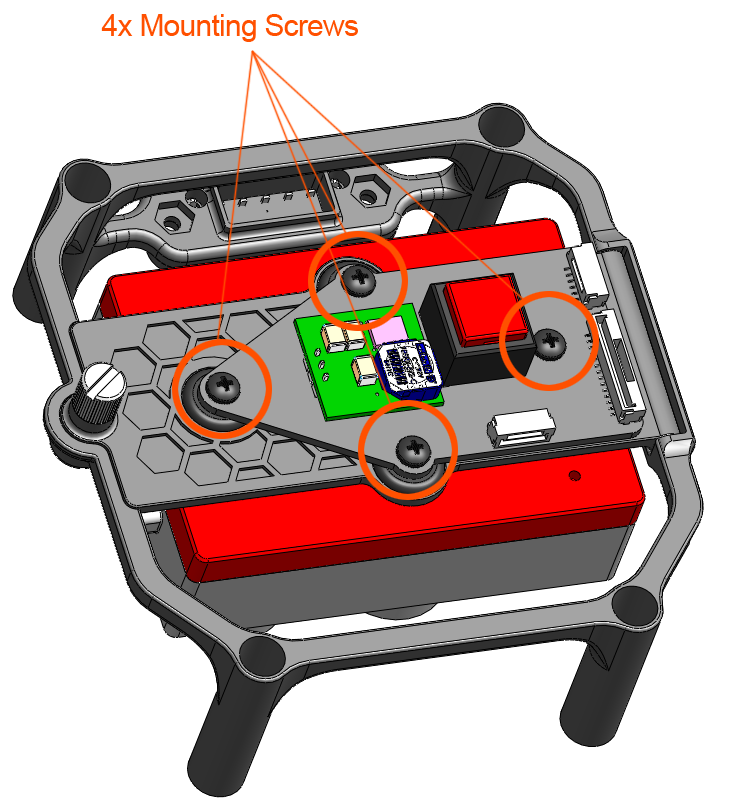
The camera mount is secured within the aircraft using 4x 6-32 x 3/8 inch screws (included) which fasten into the corresponding threads inside the payload bay.
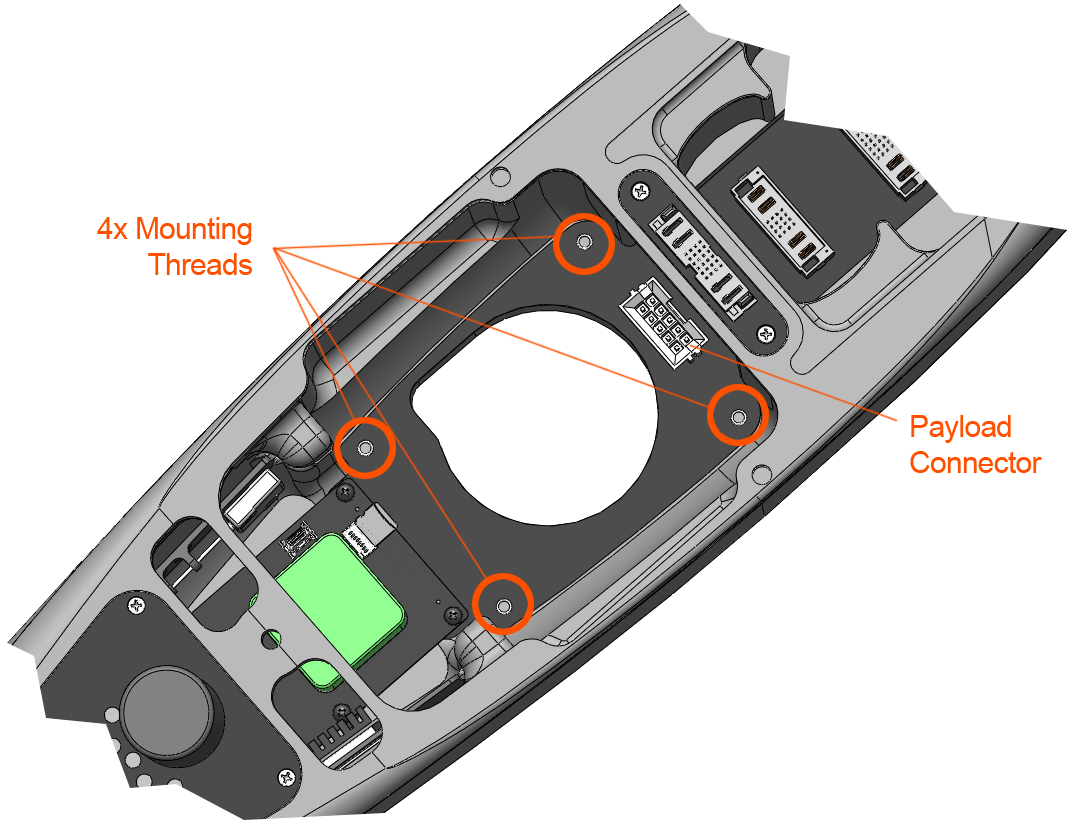
- Insert the mount into the payload connector
Secure the mount to the payload bay using the 4x mounting screws

Tighten the screws (finger tight). The screwdriver included with the toolkit works, but you may find it easier to use one with a longer reach.
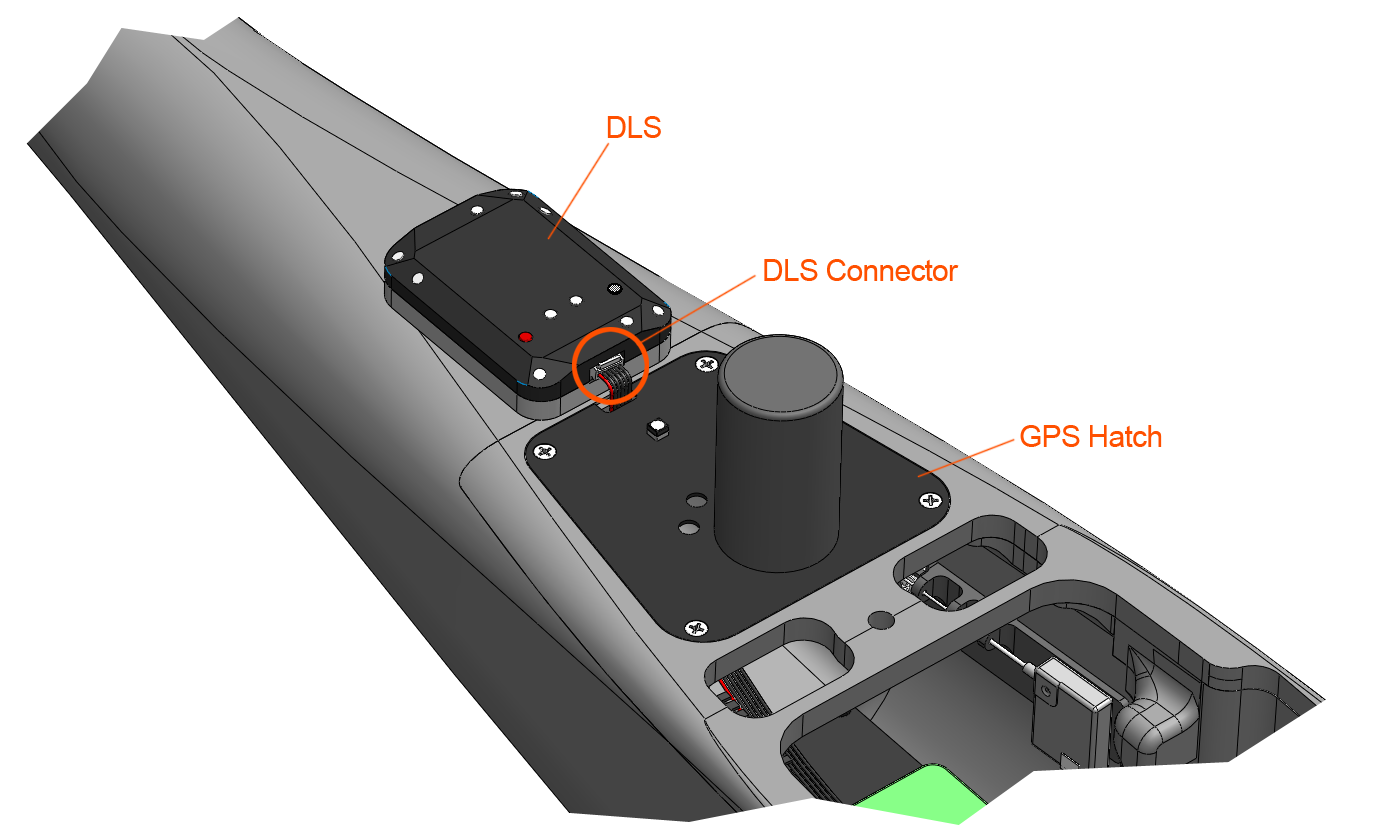
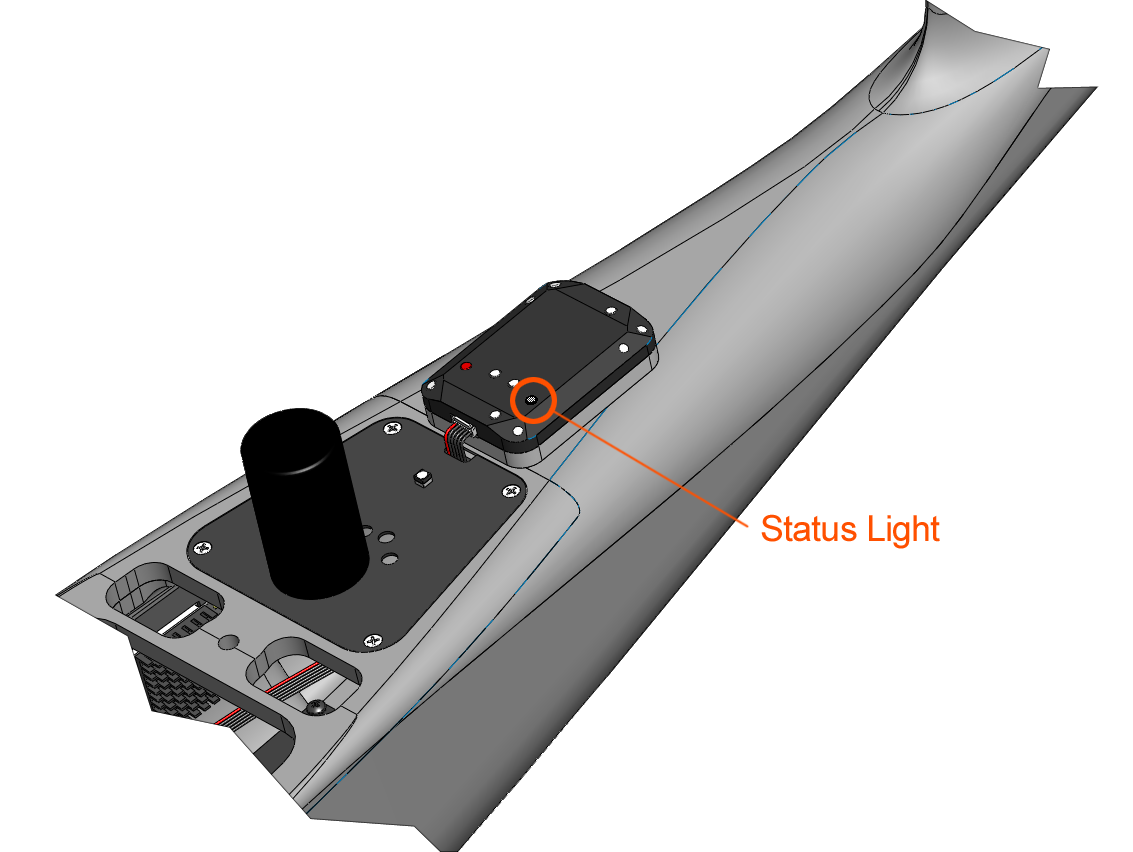
Attach the DLS to the top of fuselage just behind the GPS hatch as shown (connector must face forward) using doubled sided tape or adhesive-backed Velcro. Velcro will let you easily remove the DLS when not flying the multispectral payload.
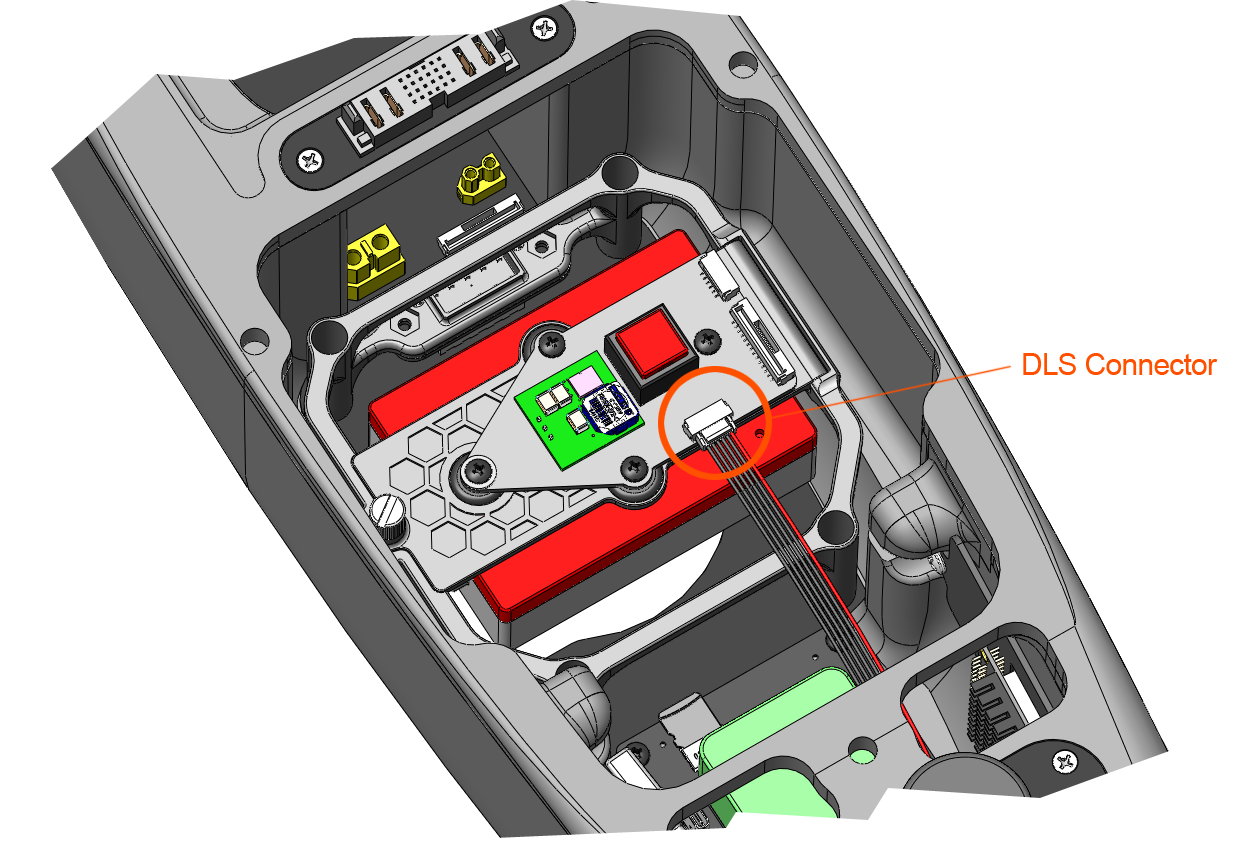
Attach DLS cable to the DLS
Attach other side of DLS cable to payload by routing the cable through the notch in the GPS hatch. You may need to undo the GPS hatch screws to route the DLS wire. On Lynx VTOL #079 and older, contact support@srp.aero.
Triggering the Camera
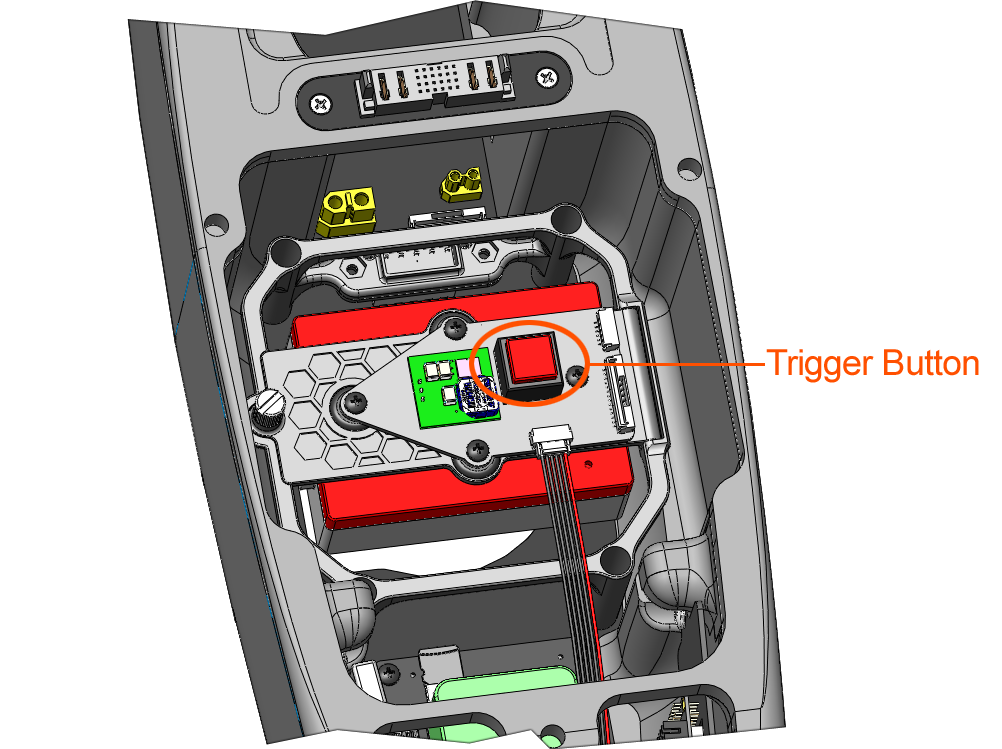
The camera can be triggered manually with the trigger button to, for example, take a picture of the MicaSense calibration target.
Whenever the camera takes an image, manually or from the autopilot, the status light on the DLS will flash blue. This is your only cue as to whether or not an image was taken during the payload check preflight step.
SD Card
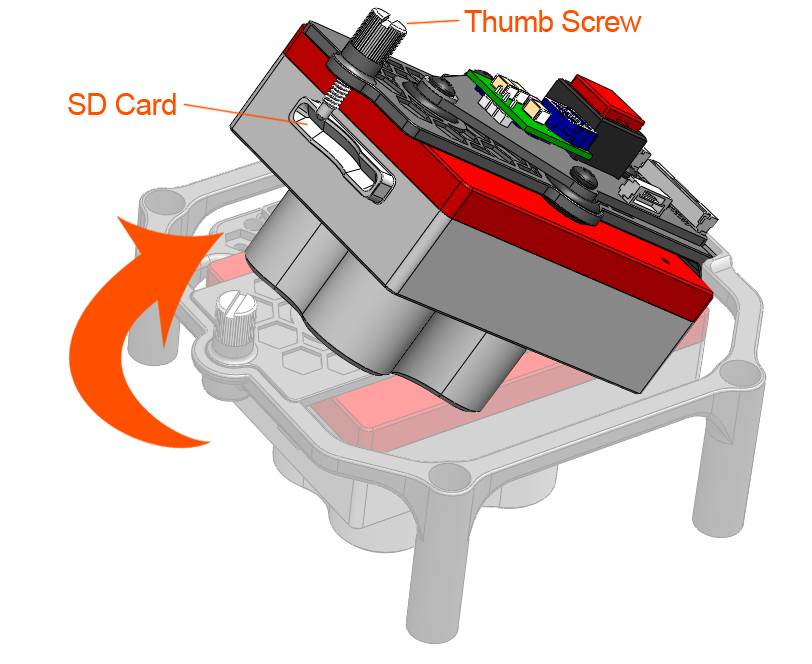
The mount features a hinging mechanism that allows you to access the camera's SD card while the camera is installed within the aircraft. To access the SD card, simply loosen the thumbscrew and pivot the camera upward. Tighten the thumbscrew before flying or transport.
Removing the Camera
- Disconnect the DLS cable from the camera mount.
- Unscrew the four mounting screws holding the RedEdge-MX mount in place.
- Pull the camera mount upward to disconnect the payload connector.
- Remove the DLS and DLS cable.
The DLS should be removed when not flying the RedEdge-MX.
Geo-Tagging Multispectral Images
Multispectral imagery is automatically geo-tagged in flight using the autopilot's GPS and heading data. Additional processing is only required if PPK accuracy is required.
Providing your own Camera
Menu Configuration
The camera settings in the table below are set by SRP Aero if you purchase a payload with your Lynx VTOL. If you are providing your own camera, the following menu settings must be configured before flying.

- Power on the camera. Connect to the RedEdge-MX's WiFi with the password of micasense. Open a browser and type the default IP of 192.168.10.254 in the address bar to open the MicaSense Camera App.
- Go to the settings tab.
- Under 'Auto-Capture Mode' select 'Ext. Trigger'
- Under 'Ext Trigger Mode' select 'Rising Edge'
- Save
Expand 'Advanced Configuration'
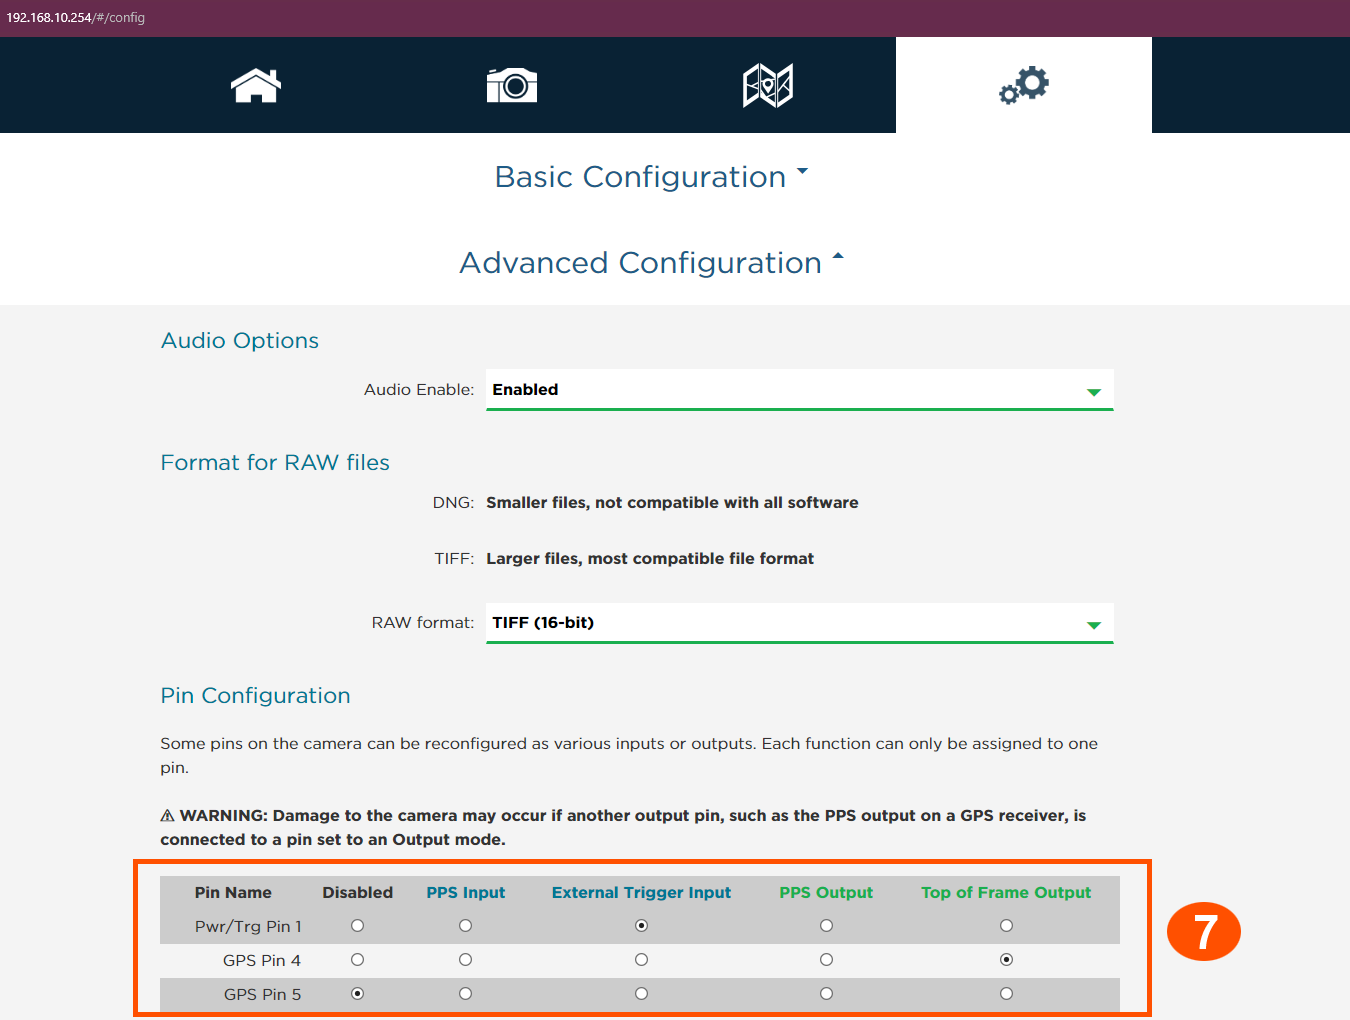
Set the 'Pin Configuration' to match the table shown
- Scroll down and save your changes.
Camera Status
In the same MicaSense Camera App, you can monitor the camera's status and manually capture photos.

- Go to the home tab.
- Check that you have enough space on the SD card before flying.
- Under 'GPS Sats' you will notice that 0 satellites are being used, this is because the camera is getting GPS data from the autopilot.
The heading shown is internal to the camera and can be ignored. The actual heading used for geo-tagging is provided by the autopilot.
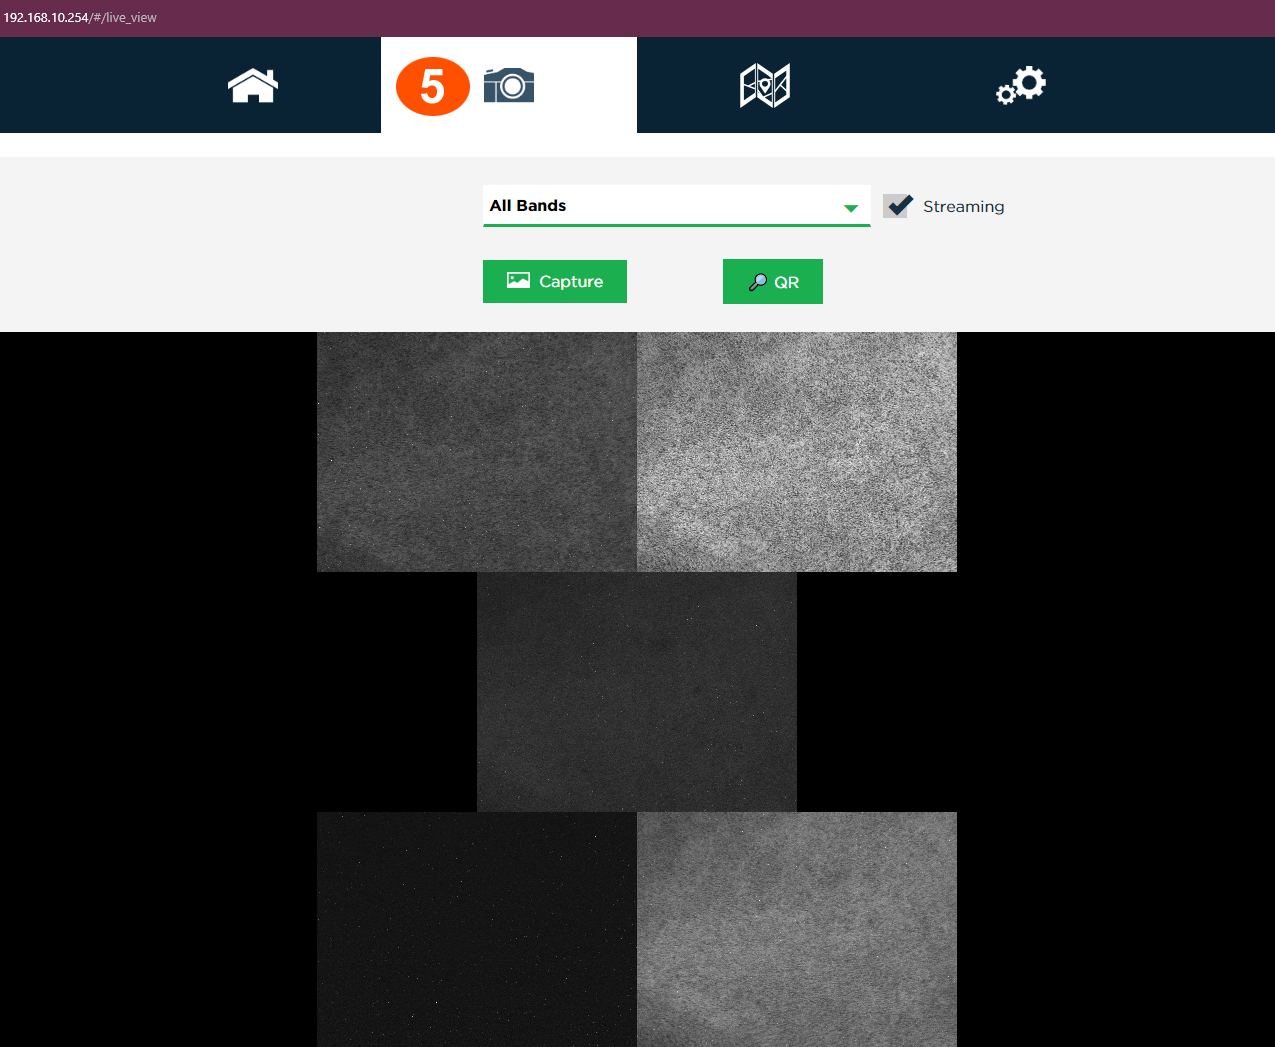
On the camera tab, you can view the camera's field-of-view or manually capture photos.