Replacing a Servo
Servos need to be replaced every 100 flight hours or if damaged in any way. The same process is used for all Lynx VTOL servos.
Servos must be replaced with a set of calibrated servos from SRP, failure to do so may result in a crash.
Tools Needed: crescent wrench, philips screwdriver
To replace a servo:
Disconnect the batteries from the aircraft.
Disconnect the servo linkage from the servo arm. This may be either a clevis device or ball joint and screw.
Once disconnected from the servo, do not spin the clevis, ball joint, or control rod. Doing so will change the linkage length and may affect flight control surfaces. A piece of tape may need to be place onto the clevis device to stop it from spinning.
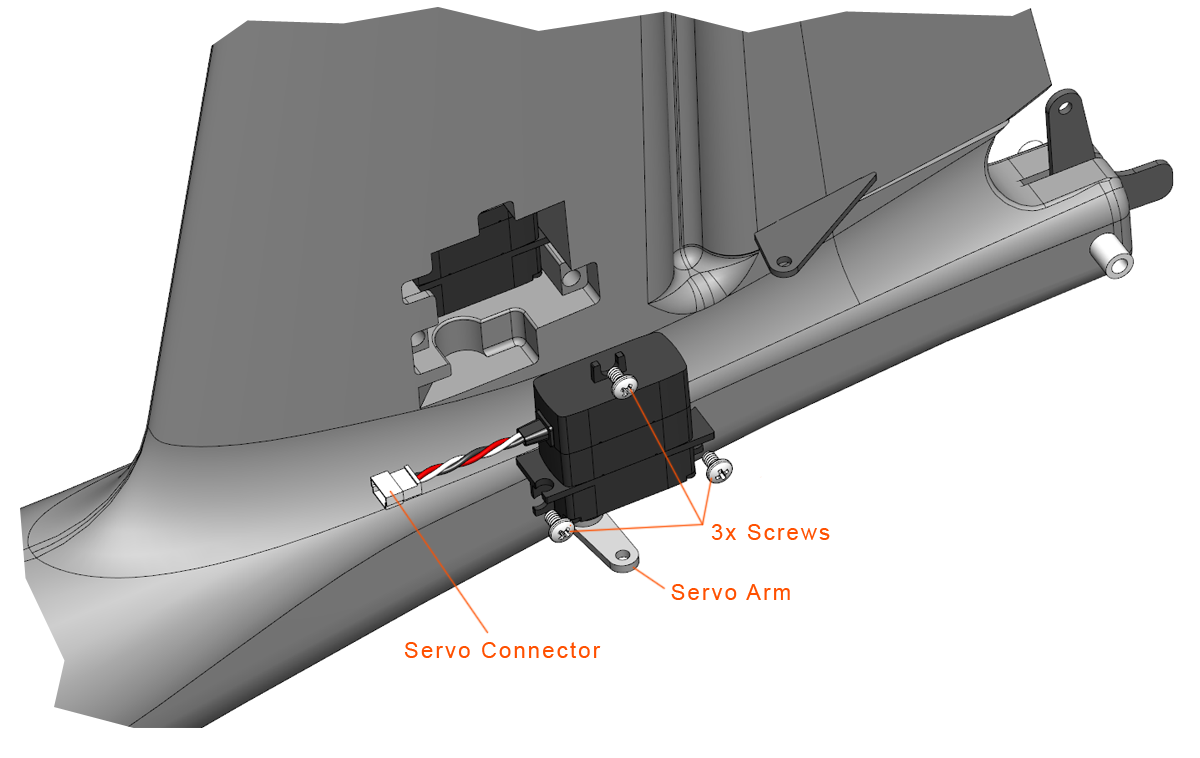
Loosen the three screws holding the servo down.
Remove the servo by pinching the servo arm.
Carefully disconnect the servo connector. Try to avoid pulling from the wires. Instead, pull apart from the connector housing.
Reconnect the appropriate replacement servo.
Install the replacement servo back into place taking care not to pinch the servo wire.
Tighten the three screws finger tight.
Reattach the servo linkage to the servo arm.
Replacement servos are calibrated such they should be drop-in replacements. When the aircraft is on, the flight control surface deflection should be very close to the original. Each servo is calibrated differently for each flight control surface. For example, you can only use a left aileron servo to replace a left aileron servo, and so on.